
Recently I was asked by bornprettystore.com to review some of their products and I'm so happy to present you with the first review today! So if you want to find out about water decals and how to create this shabby chic design, keep on reading!

Barry M Lychee
Orly Country Club Khaki
NYC 246 Park Ave
Rimmel Jungle Princess
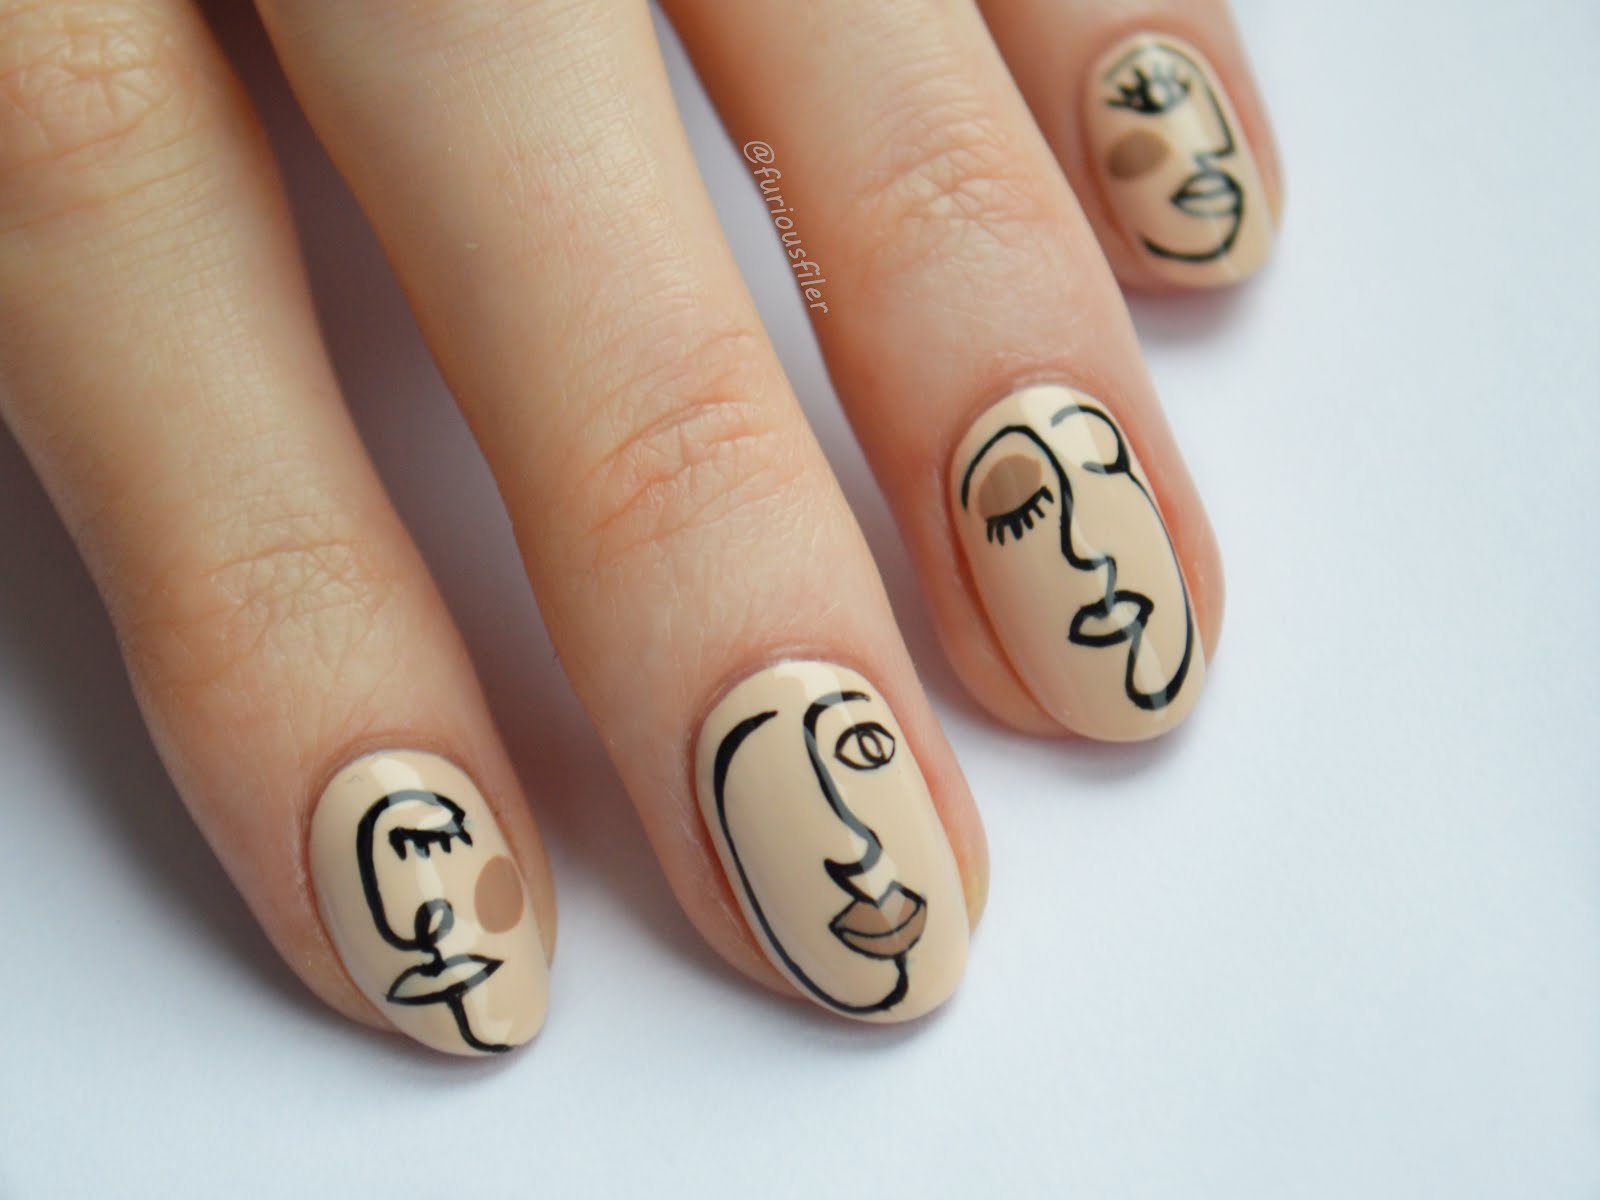
Nail art water decal sheet
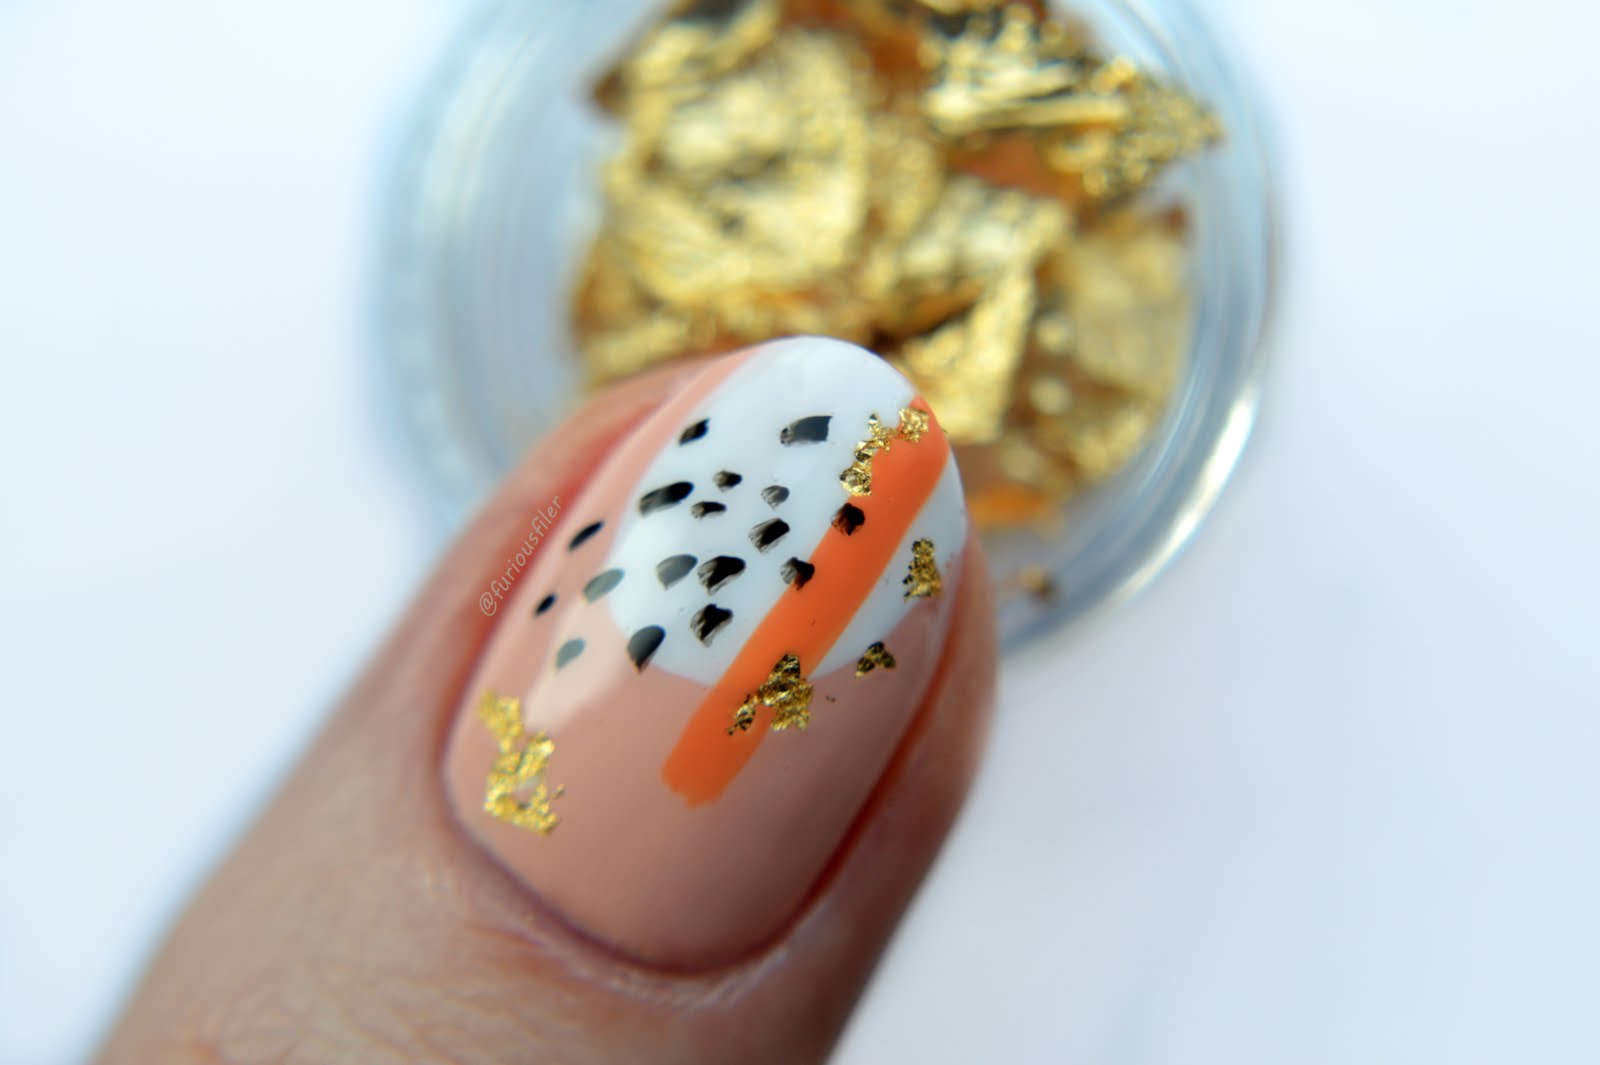
Let me start with my own design. The decals look vintage to me so I wanted to pair it with a shabby distressed wood design. First I painted my nails with Barry M Lychee. It's important to wait until your nails are absolutely dry. Now all you have to do is dab Orly Country Club Khaki, NYC 246 Park Ave and Rimmel Jungle Princess at random with a sponge. To finish it off I made an outline and a line in the middle using NYC 246 Park Ave and a striping brush. That's it, easy peasy! Now onto the water decals.
First let me say that the details on this water decal sheet really are beautiful. It's a rectangular sheet rather than a set of decals that fit your nails. This means that once you cut your decal you need to round the area close to the cuticle to have a nice clean line. Alternatively, you can fix it once you secure it with a top coat but I think it's more time consuming and you're risking pulling at the delicate design. I wanted to show you what the sheet looks like but when it arrived I was so excited I just cut it and applied it straight away! Fear not, here is where you can have a look at it and purchase it should you wish. The one I'm using is BLE2109. At the moment this product is 30% off and you can use my code SXL91 to get another 10% off. Born pretty store also ships for free internationally! What's not to like?!
To apply it, I cut a rectangular from the sheet with the design I liked and made sure it was more or less the width of my nail. I wouldn't cut too much off the end because the decal may shrink a bit and you'll be left with a gap. TAKE THE PROTECTIVE COVER OFF! I, of course, forgot to at first which resulted in a serious losing session. I so envy all the girls who say nail art is relaxing them! How do you do it?! Let me guess, you read the instructions.... Anyway, I then placed the decal in a bowl of water for 10-20 seconds until the paper slid off the design and applied it on my nail. This is where it usually gets tricky for me.
I love stickers and water decals but I always have problems using them. See, my nails are very round and stickers are flat which means I always end up with creases around my nails. However these stickers are different. The creases "dissolve" once you apply a top coat and you're left with a nice smooth nail! You have to be careful though, if you apply too much you may dissolve more than you hoped for! One coat is enough. Also I've noticed it's better to use a very runny top coat. To minimise the creases I held the decal on my ring finger with my thumb (the same hand) and at the same time tried to smooth the edges out with my other hand. I find that it flattens the creases and the decal adheres better to the nail.
I have to say I'm very impressed with the opacity of these stickers. Sometimes you don't realise how see through the design is until you get it out of the water. Of course that's fine, depending on what effect you're going for. This water decal has the exact same colours and opacity before and after you place it into water. I wasn't sure whether to apply a base colour before the decal but I now know there's no need for it. I'm not wearing any in the picture. I think this is great because should you want to apply it on all of your nails you don't need to wait for any colour to dry. You can just crack on with the decals and save yourself loads of time!

Thanks so much for reading!


No comments